
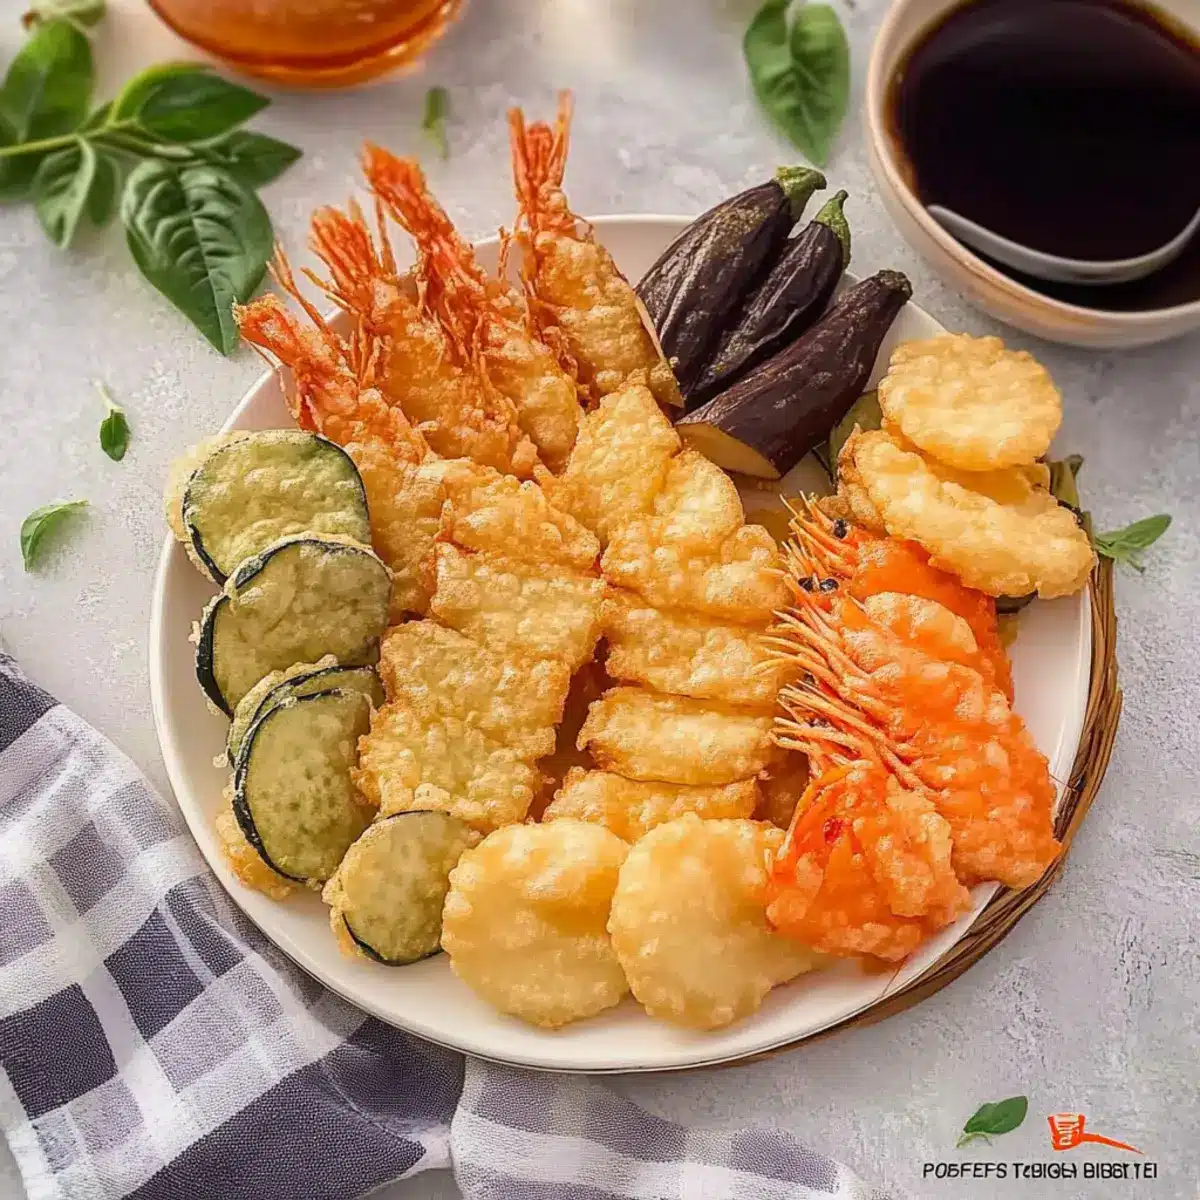
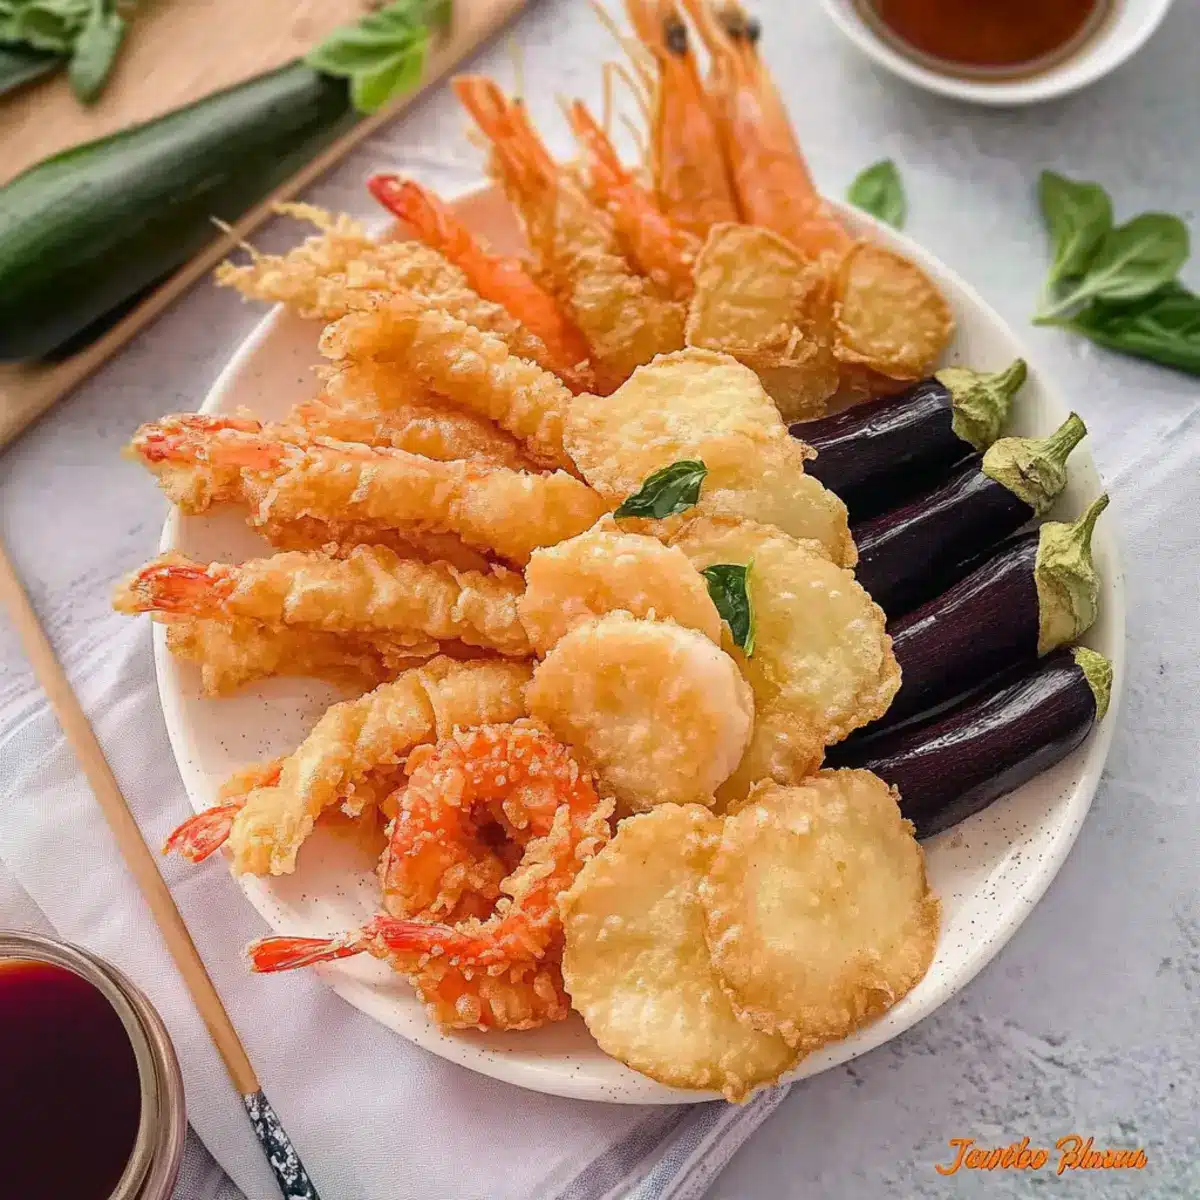
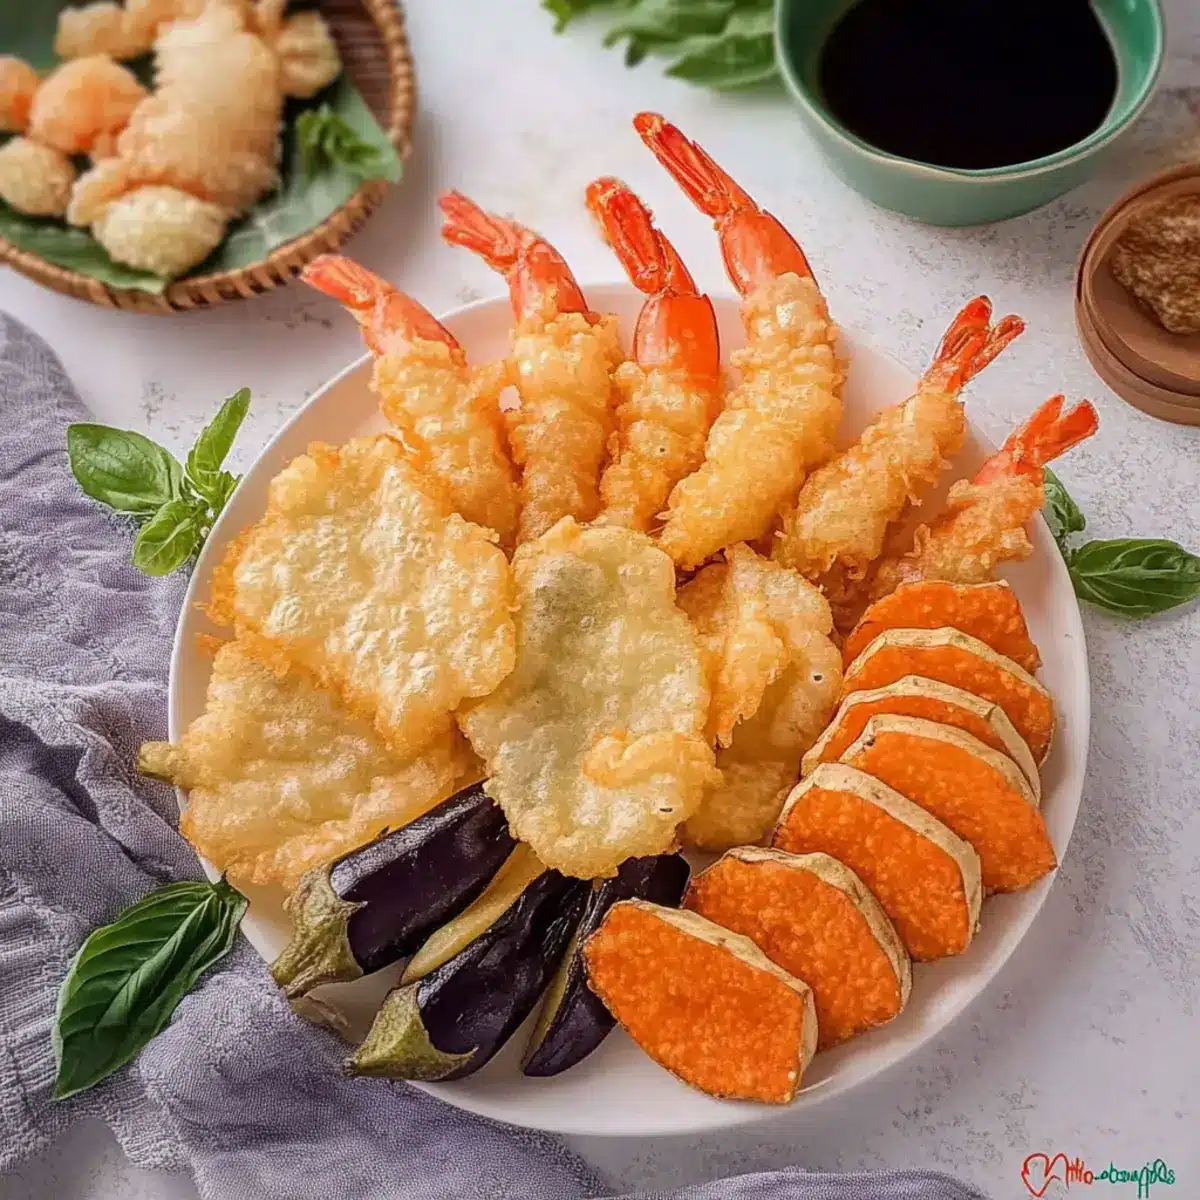
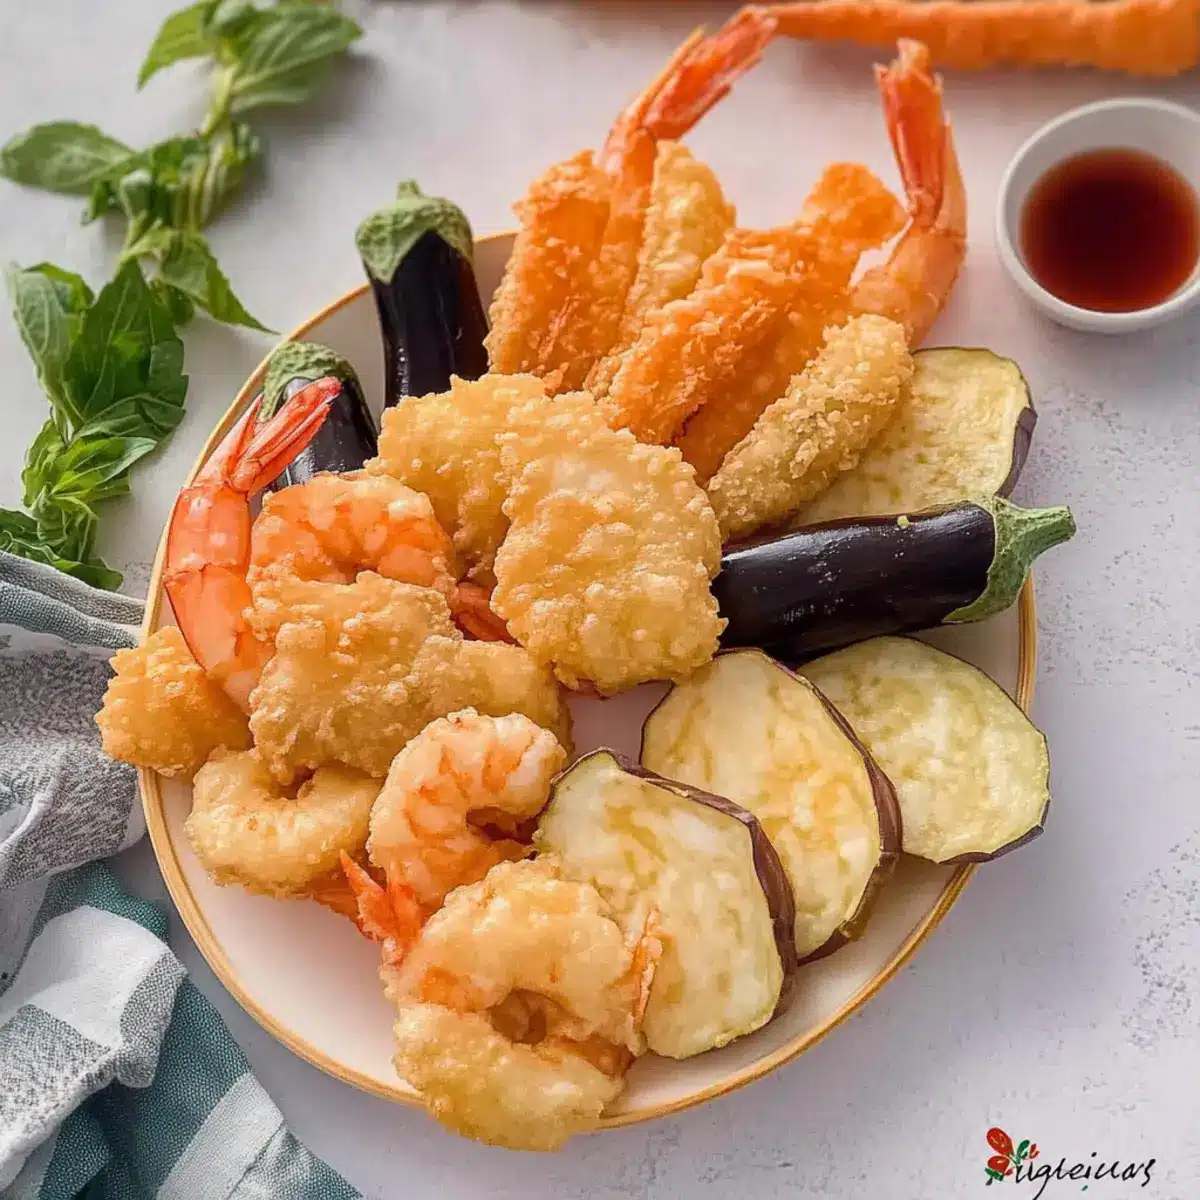
As I sifted through the pantry, the thought of gluten-free tempura danced in my mind, calling for a delightful crunch that elevates simple ingredients into something extraordinary. This gluten-free tempura recipe is my go-to solution for satisfying cravings without the weight of gluten, perfectly enveloping an array of seafood and vegetables in a light, crisp batter. Whether you’re planning appetizers for guests or a quick family dinner, this versatile dish is not just indulgent but also brilliantly easy to whip up. With just a few pantry staples, you can create a satisfying treat that’s quick to prepare and sure to impress. Curious about how this simple recipe can transform your mealtime into a restaurant-worthy experience? Let’s dive in!
Why is Gluten-Free Tempura a Must-Try?
Irresistible flavor awaits: This gluten-free tempura boasts a surprisingly light and crisp texture, allowing the flavors of your favorite seafood and vegetables to shine through. Versatile delight: Use this batter to create appetizers or snacks that’ll please any crowd, from kids to gourmet enthusiasts. Quick and easy preparation: With minimal ingredients, you’ll have dinner ready in no time—a perfect solution for busy evenings. Adapt to your taste: Feel free to swap in seasonal veggies or proteins for endless variations. Plus, serve it with your favorite dipping sauces for an elevated experience!
Gluten-Free Tempura Ingredients
• Get ready for a crispy delight!
For the Batter
- Rice Flour – Provides structure and a light texture; can substitute with a gluten-free all-purpose flour blend if needed.
- Corn Starch – Contributes crunchiness for that crispy coating; no direct substitute recommended for optimal texture.
- Salt – Enhances flavor and balances sweetness; adjust based on dietary needs.
- Cold Soda Water – Adds carbonation, making the batter light and airy; my tip is to use sparkling water as an alternative.
- Baking Soda – Helps to lighten the batter for improved crispiness; make sure to mix just before using.
- White Vinegar – Works alongside baking soda to create a super-crisp texture; combine with baking soda for the best results.
For the Veggies and Seafood
- Prawns – The star of the show; these add a delightful sweetness. You can substitute with white fish or chicken if you prefer!
- Vegetables (Sweet Potato, Eggplant, Daikon, Onion, Spinach) – These provide diverse flavors and interesting textures; feel free to swap with seasonal favorites like zucchini or bell peppers!
For Frying
- Oil (for frying) – Essential for achieving that coveted crispy texture; choose an oil with a high smoke point like canola or vegetable oil.
Step‑by‑Step Instructions for Gluten-Free Tempura
Step 1: Prepare the Prawns
Start by prepping your prawns, making gentle, shallow cuts along the belly to prevent curling while frying. This technique will ensure they remain straight and cook evenly. Once prepped, set them aside as you prepare your batter, allowing them to take center stage in your delicious gluten-free tempura.
Step 2: Heat the Oil
In a deep fryer or a large heavy pot, pour in enough oil to submerge your tempura items. Heat the oil to 350°F (175°C), using a thermometer for accuracy. When hot, test a small drop of batter in the oil; it should sizzle and rise to the surface immediately, signaling that your oil is ready for a crispy gluten-free tempura.
Step 3: Mix the Batter Dry Ingredients
In a medium mixing bowl, combine rice flour, corn starch, and salt. Whisk them together until evenly blended. This gluten-free batter base will provide the perfect structure for coating your seafood and vegetables, so make sure there are no lumps to achieve that delightful crispness in your finished tempura.
Step 4: Create the Batter
Slowly pour in cold soda water to the dry mixture, whisking gently to form a smooth batter. Aim for a consistency that coats the back of a spoon without being too thick. The carbonation from the soda water is key to achieving that light texture in your gluten-free tempura, giving it a fantastic crunch when fried.
Step 5: Activate the Batter
Combine baking soda with white vinegar in a small bowl, watching for the bubbling reaction. Once activated, quickly fold this mixture into your batter. This step is crucial for achieving that impressive crispiness in your gluten-free tempura, enhancing its airy texture as it cooks.
Step 6: Coat the Ingredients
Take your prepared prawns and vegetables, and dip them into the batter, making sure they’re well-coated. Allow any excess batter to drip off before frying. This will help minimize oil absorption, leading to a lighter and crispier gluten-free tempura, and ensuring your seafood and veg shine through.
Step 7: Fry in Batches
Carefully lower each battered piece into the hot oil, frying in small batches to avoid overcrowding. Cook for about 2-3 minutes, or until they turn a beautiful golden brown. Keep an eye on them while frying to ensure even cooking and prevent any burning, as the oil temperature plays a key role in achieving that perfect tempura crunch.
Step 8: Drain and Serve
Once golden brown, use tongs or a slotted spoon to remove the tempura from the oil. Place them on a cooling rack or paper towel lined plate to drain excess oil and maintain crispiness. Serve your glorious gluten-free tempura hot, paired with your favorite dipping sauce for an unforgettable appetizer or family dinner treat.
Expert Tips for Gluten-Free Tempura
-
Chill Everything: Use chilled ingredients, both the soda water and the flour, to ensure your gluten-free tempura stays light and crispy. Warm ingredients can yield a soggier texture.
-
Monitor Oil Temperature: Keep an eye on your oil temperature; if it drops below 350°F (175°C), your tempura will absorb more oil and lose its crunch.
-
Fry in Batches: Avoid overcrowding your fryer or pan. Fry small batches to maintain consistent oil temperature and to ensure even cooking for the best gluten-free tempura.
-
Dip & Drip: Allow excess batter to drip off each piece before frying. Too much batter can lead to oil absorption and a heavier result than desired.
-
Experiment with Dipping Sauces: Complement your gluten-free tempura with delicious dipping sauces like gluten-free soy sauce or homemade ginger sauce to enhance flavors and elevate your dish.
What to Serve with Gluten-Free Tempura
Elevate your tempura experience with side dishes and pairings that harmonize flavors and textures beautifully.
- Crispy Chilled Salad: A refreshing mix of crunchy cucumbers and radishes drizzled with sesame dressing adds a delightful contrast to the lightness of the tempura.
- Savory Miso Soup: Its warm, umami-rich broth complements the crispy tempura, providing a comforting balance that enhances the flavors of both.
- Steamed Jasmine Rice: This aromatic, fluffy rice serves as a neutral base that soaks up the dipping sauces, while also maintaining a light profile alongside the tempura.
- Sweet Potato Fries: Their natural sweetness and satisfying crunch offer an irresistible contrast; dip them in spicy mayo for a delightful twist!
- Soy Dipping Sauce: A savory, gluten-free soy sauce mixed with finely grated ginger brightens the flavors of the tempura and accentuates its crunchiness.
- Pickled Vegetables: A zesty assortment of quick-pickled veggies cuts through the richness of the tempura, imparting brightness and crunch to your meal.
- Green Tea: This traditional pairing warms the palate and offers delightful earthy tones that harmonize with the tempura’s crispy element.
- Mochi Dessert: Sweet and chewy, this ending provides a delightful texture contrast to the meal, satisfying your sweet tooth with a touch of nostalgia.
Storage Tips for Gluten-Free Tempura
Room Temperature: Enjoy your gluten-free tempura fresh for the best taste and texture. If left out, consume within 1 hour to maintain quality.
Fridge: If you have leftovers, store in an airtight container in the fridge for up to 3 days. Reheating is essential to restore some crispiness.
Freezer: For longer storage, freeze the cooked tempura in a single layer on a baking sheet, then transfer to an airtight container for up to 2 months.
Reheating: To bring back the crunch, reheat in an oven at 375°F (190°C) for about 10-15 minutes, avoiding the microwave to prevent sogginess.
Gluten-Free Tempura Variations & Substitutions
Feel free to make this gluten-free tempura your own by exploring these exciting variations and substitutions that cater to all tastes!
-
Dairy-Free: Replace any dipping sauce ingredients that contain dairy with coconut milk or nut-based alternatives, maintaining a light and refreshing flavor.
-
Vegetable Twists: Swap out traditional vegetables for seasonal favorites like zucchini, bell peppers, or mushrooms. Their unique flavors and textures invite diverse culinary experiences!
-
Protein Alternatives: For a different take, use white fish or scallops instead of prawns. These proteins absorb flavors beautifully, making every bite deliciously satisfying.
-
Spicy Kick: Craving some heat? Add a pinch of cayenne pepper to the batter for a spicy twist that wakes up your taste buds.
-
Herb Infusion: Incorporate finely chopped herbs like cilantro or basil into the batter. This creates a fresh aroma and extra depth of flavor that complements your seafood or veggies.
-
Flavored Dipping Sauces: Elevate your tempura with a homemade ginger-based sauce or spicy mayo. These zesty accompaniments enhance the eating experience, adding a gourmet touch!
-
Gluten-Free All-Purpose Flour: Out of rice flour? A quality gluten-free all-purpose flour blend can work seamlessly as a substitute, ensuring the same great crunch and flavor.
-
Carbonation Alternatives: If you don’t have soda water, feel free to use cold sparkling water or even beer for a unique twist on flavor and bubbly texture.
Get creative and enjoy crafting your personalized take on this crispy delight! Whether you’re enhancing with spices or simply opting for new dipping companions like homemade ginger sauce or gluten-free soy sauce, the possibilities are endless.
Make Ahead Options
Making gluten-free tempura ahead of time can truly save precious minutes on busy weeknights! You can prepare the batter up to 24 hours in advance; simply mix the rice flour, corn starch, and salt, then combine with the cold soda water just before frying to keep the texture light. Additionally, you can coat your cleaned prawns and vegetables in the batter and refrigerate them for about 3 hours. To maintain quality, cover them tightly to prevent moisture loss and ensure they retain their crispiness. When you’re ready to serve, heat your oil to the optimal temperature, fry in small batches for golden perfection, and indulge in your delicious gluten-free tempura—just as delectable as when freshly made!
Gluten-Free Tempura Recipe FAQs
What kind of rice flour should I use for gluten-free tempura?
Absolutely! I recommend using glutinous rice flour for the best texture, but other rice flours work too. Be sure to check that it’s labeled gluten-free to ensure it fits your dietary needs.
How long can I store gluten-free tempura in the fridge?
If you have leftovers, store your gluten-free tempura in an airtight container in the fridge for up to 3 days. When ready to enjoy again, reheating in an oven is best to regain that lovely crispiness!
Can I freeze gluten-free tempura?
Yes, you can absolutely freeze gluten-free tempura! First, let them cool completely. Lay them out in a single layer on a baking sheet and freeze for a few hours. Once firm, transfer them to an airtight container or freezer bag to keep for up to 2 months.
What should I do if my gluten-free tempura batter is too thick?
If you find your batter is too thick, simply whisk in a little extra cold soda water until you reach your desired consistency. It should be smooth and lightly coats the back of a spoon. Remember, a lighter batter contributes to a crispier final product!
Are there any allergens I should be aware of when making gluten-free tempura?
Great question! While the main components are gluten-free, ensure you’re buying gluten-free soy sauce if you plan to use it for dipping. Additionally, if you’re using seafood like prawns, be cautious of shellfish allergies. You can always substitute with chicken or veggies if needed.
What oil is best for frying gluten-free tempura?
I often recommend canola or vegetable oil due to their high smoke points, which make them ideal for frying. This helps to achieve that perfect crispy texture without burning, ensuring your gluten-free tempura comes out wonderfully light and airy!
Irresistible Gluten-Free Tempura: Crunchy Delight for All!
Ingredients
Equipment
Method
- Prepare the prawns by making gentle, shallow cuts along the belly to prevent curling while frying.
- Heat enough oil in a deep fryer or a large pot to submerge your tempura items to 350°F (175°C).
- In a mixing bowl, combine rice flour, corn starch, and salt, whisking until evenly blended.
- Slowly pour in cold soda water to dry mixture, whisking gently to form a smooth batter.
- Combine baking soda with white vinegar in a bowl, then quickly fold this mixture into your batter.
- Coat the prepared prawns and vegetables in the batter, allowing excess to drip off.
- Fry the battered pieces in small batches for about 2-3 minutes or until golden brown.
- Once golden, remove from oil and place on a cooling rack or paper towel lined plate to drain.
Leave a Reply