
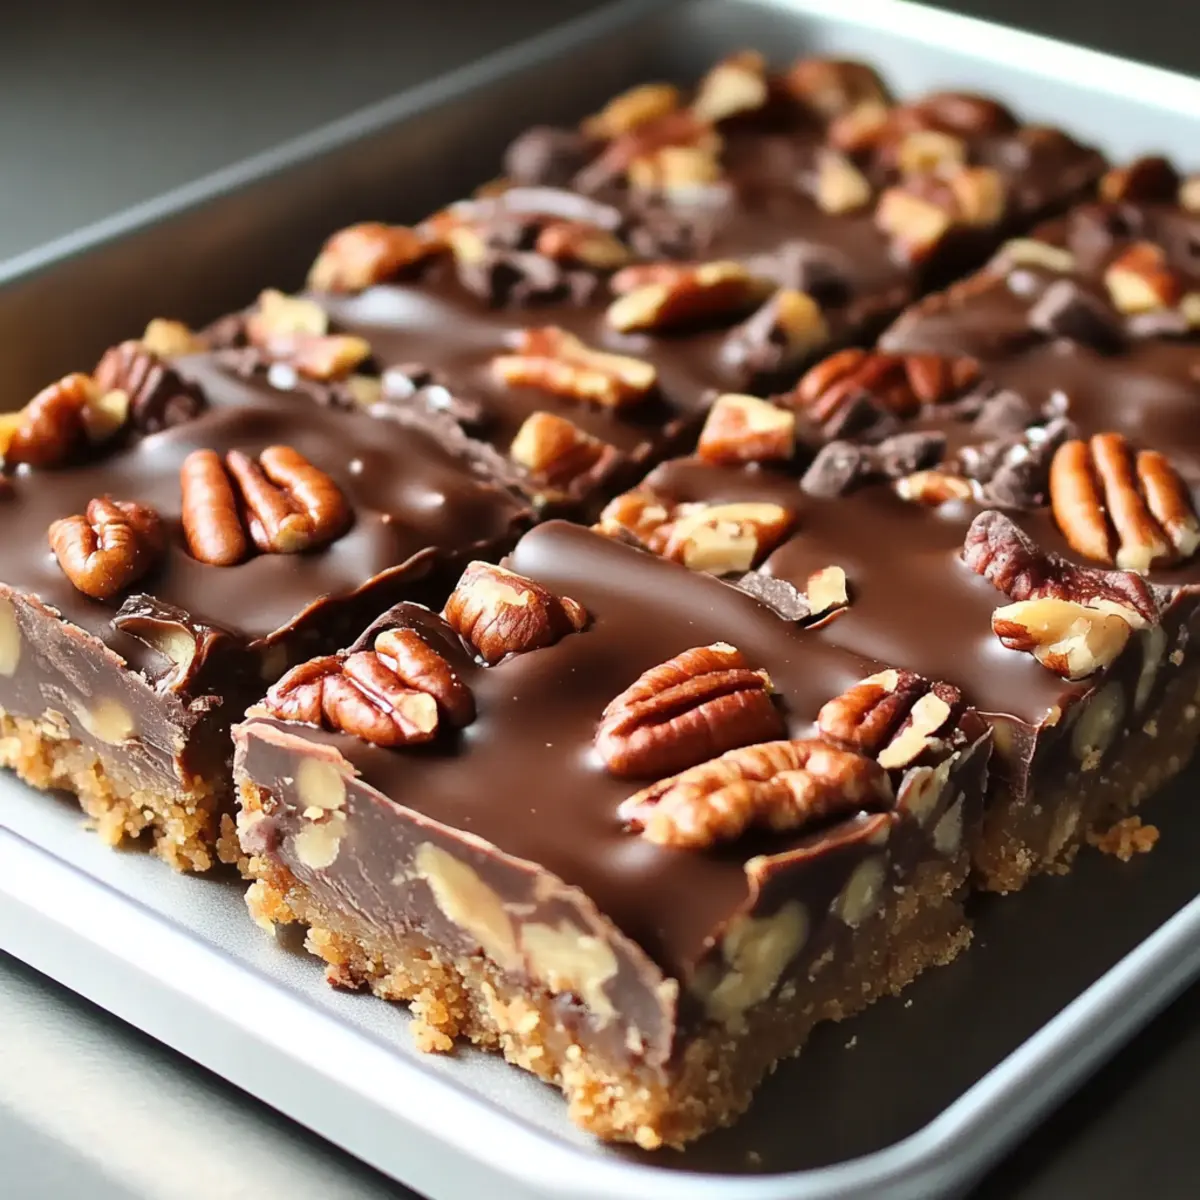
In the midst of dessert dreamland, I stumbled upon a revelation—the perfect blend of chocolate, caramel, and pecans can take the form of Easy Turtle Bars. This simple indulgence comes together in a matter of minutes, elevating your dessert game with minimal fuss. The buttery shortbread crust lays a crisp foundation, balancing the gooey, sweet caramel and velvety chocolate that invite every sweet tooth to join the party. With just a few pantry staples and uncomplicated steps, you’ll impress not only yourself but anyone lucky enough to share in this treat. Whether you’re planning a cozy family night or an elegant gathering, these bars are bound to become a go-to favorite. Ready to whip up something extraordinary without the headache? Let’s dive into this delightful recipe together!
Why Make Easy Turtle Bars?
Simplicity, these Easy Turtle Bars are a breeze to whip up, making them an ideal choice for both seasoned bakers and newcomers alike. Rich Layers of gooey caramel and smooth chocolate on a buttery crust promise to satisfy any sweet craving. Crowd-pleaser, they’re perfect for gatherings, sure to have everyone reaching for seconds! Make-Ahead Friendly: Prepare these delicious bars two days in advance for maximum flavor infusion—great for busy schedules! Customization is effortless; swap in different chocolate or nuts to match your taste preferences. Imagine indulging in a treat that’s not just easy but truly heavenly!
Easy Turtle Bars Ingredients
• Here’s everything you need for a delicious treat!
For the Crust
- Cold Butter – Ensures a rich and crumbly texture for the perfect base.
- Granulated Sugar – Sweetens the crust; using brown sugar adds a touch of caramel flavor.
- All-Purpose Flour – Provides structure to the crust; try gluten-free flour for a dietary alternative.
For the Caramel Layer
- Sweetened Condensed Milk – Creates the gooey caramel that makes these Easy Turtle Bars irresistible.
- Chopped Pecans – Offers a nutty crunch; substitute with walnuts or omit for a nut-free version.
For the Topping
- Chocolate Chips – Melts to create a smooth, rich topping; dark chocolate intensifies the flavor beautifully.
Optional Garnishes
- Sea Salt – A sprinkle on top elevates the flavor; try a drizzle of chocolate for extra pizzazz!
Step‑by‑Step Instructions for Easy Turtle Bars
Step 1: Prepare the Crust
Begin by preheating your oven to 350°F (175°C). In a mixing bowl, combine 1 cup of cold butter, 1 cup of granulated sugar, and 2 cups of all-purpose flour. Using your hands or a pastry cutter, mix until the mixture resembles coarse crumbs. Press this crumbly blend firmly into the bottom of a greased 9×13-inch baking dish to form a crust.
Step 2: Bake Crust
Place the crust in your preheated oven and bake for approximately 15 minutes. You want it to turn a light golden brown; keep an eye out for this color change as it signals that it’s ready to come out. Once baked, remove the crust from the oven and set it aside to cool slightly while you prepare the caramel layer.
Step 3: Make Caramel Layer
In a medium saucepan over low heat, combine one can (14 ounces) of sweetened condensed milk and 1 cup of chopped pecans. Stir constantly for about 5-7 minutes until the mixture begins to bubble and thicken. This delicious caramel layer will form the heart of your Easy Turtle Bars, so keep stirring to avoid burning.
Step 4: Layer Caramel
Once the caramel mixture has thickened, pour it evenly over the pre-baked crust, using a spatula to spread it smoothly. Ensure that the caramel reaches all corners of the crust for a uniform layer. Allow this to set for a few moments while you prepare for the chocolate topping.
Step 5: Melt Chocolate
In a microwave-safe bowl, add 2 cups of chocolate chips. Heat them in the microwave at 30-second intervals, stirring in between, until completely melted and smooth; this should take about 1-2 minutes. Once melted, pour the smooth chocolate over the caramel layer and gently spread it out to cover completely.
Step 6: Cool Completely
Let your Easy Turtle Bars cool at room temperature for at least 2 hours, allowing all layers to set nicely. This is crucial; if you cut them too early, the bars may not hold their shape. For even better results, consider refrigerating them for an hour for clean, beautiful edges when slicing.
How to Store and Freeze Easy Turtle Bars
Room Temperature: Store bars in an airtight container at room temperature for up to 1 week for optimal freshness and flavor.
Fridge: If you prefer a chilled treat, refrigerate the bars in an airtight container for up to 2 weeks. This also helps maintain their gooey texture.
Freezer: For longer storage, wrap the bars tightly in plastic wrap and then foil, freezing for up to 3 months. Thaw overnight in the fridge before enjoying.
Reheating: To enjoy the bars slightly warm, microwave individual pieces for about 10-15 seconds, just until the chocolate softens, enhancing the indulgent experience.
Easy Turtle Bars Variations & Substitutions
Feel free to get creative with these Easy Turtle Bars, customizing the recipe to tantalize your taste buds. Let’s explore some fun tweaks that can add exciting new flavors and textures!
- Nut-Free: Replace chopped pecans with sunflower seeds or omit completely for a nut-free delight.
- Gluten-Free: Use a gluten-free flour blend instead of all-purpose flour for a celiac-friendly version.
- Chocolate Alternatives: Swap chocolate chips for butterscotch or white chocolate chips for a different twist.
- Dairy-Free: Choose coconut condensed milk and dairy-free chocolate chips to make a dairy-friendly dessert.
- Salty Sweet: Add a sprinkle of flaky sea salt on top of the chocolate layer for a delightful salty contrast.
- Flavor Boost: A teaspoon of espresso powder mixed into the melted chocolate enhances the chocolate’s richness.
- Caramel Twist: Use homemade caramel sauce instead of sweetened condensed milk for a gourmet touch. It brings added depth and personalization to your bars.
- Layer It Up: Add a layer of fresh raspberries or sliced bananas before topping with chocolate to infuse fruity goodness.
As you embark on your baking adventure, consider serving these bars alongside a cup of coffee or with a scoop of vanilla ice cream and your favorite dessert, like my Lime Steak Bowls for a delightful dinner that smoothly transitions into dessert! You can also pair them with a light dessert like my Ricotta Pasta Minutes for a well-rounded meal to impress your guests. Enjoy the sweetness!
What to Serve with Easy Turtle Bars?
Indulging in a batch of Easy Turtle Bars invites the perfect opportunity to craft an unforgettable dessert experience.
-
Vanilla Ice Cream: A scoop of creamy vanilla ice cream adds a cool contrast to the warm, gooey bars, enhancing every bite.
-
Fresh Berries: Juicy strawberries or raspberries bring a refreshing tartness, balancing the richness of the chocolate and caramel layers beautifully.
-
Espresso or Coffee: A bold coffee elevates the dessert moment, cutting through the sweetness while making every bite feel like a café treat.
-
Chocolate Drizzle: Amplify the decadence by drizzling melted chocolate on top, creating a visual feast that also tantalizes the taste buds.
-
Whipped Cream: Light and airy, a dollop of freshly whipped cream offers a fluffy texture that complements the dense richness of the bars.
-
Caramel Sauce: Drizzle with extra caramel for true sweet-tooth satisfaction, turning each piece into an over-the-top indulgence!
-
Salted Almonds: The savory crunch of salted almonds introduces another layer of flavor, enhancing the nutty pecans in your turtle bars.
-
Mint Tea: A soothing cup of mint tea provides a refreshing palate cleanser, making each deliciously sweet bite even more enjoyable.
-
Chocolate Milk: For a nostalgic touch, serve with a glass of chocolate milk, creating a fun, indulgent dessert moment perfect for all ages.
Make Ahead Options
These Easy Turtle Bars are perfect for busy home cooks who want to save time without sacrificing flavor! You can prepare the crust up to 24 hours in advance; simply bake it, let it cool, and store it covered at room temperature. The caramel layer can also be made ahead; just prepare it, let it cool, and refrigerate it for up to 3 days. When you’re ready to finish the bars, reheat the caramel slightly to make it easier to spread over the crust before adding the chocolate topping. Rest assured, your bars will be just as delicious and indulgent, ready to impress whenever you serve them!
Expert Tips for Easy Turtle Bars
-
Use Cold Ingredients: Keeping your butter cold ensures the crust stays crumbly and rich, preventing it from becoming too dense.
-
Stir Constantly: When making the caramel layer, constant stirring is key to avoiding a burnt taste. Don’t step away from the stove during this crucial moment!
-
Allow to Cool: Make sure to let the bars cool completely before cutting. This sets the layers and helps avoid messy edges.
-
Chill for Perfection: For sharper, cleaner slices, refrigerate the Easy Turtle Bars for about an hour before cutting them into squares.
-
Customize Toppings: Feel free to experiment with different chocolate types or nut toppings to tailor the bars to your flavor preferences.
Easy Turtle Bars Recipe FAQs
How do I select the best pecans for my Easy Turtle Bars?
Absolutely! When choosing pecans, look for ones that are fresh and free of dark spots or that smell rancid. They should be firm and crunchy, not soft or stale. If possible, opt for raw pecans that you can toast lightly for an even richer flavor in your bars.
How long can I store my Easy Turtle Bars?
You can store these bars in an airtight container at room temperature for up to 1 week. If you’d like to extend their freshness, refrigerate them instead, and they can last for up to 2 weeks while keeping that delightful gooey texture.
Can I freeze Easy Turtle Bars?
Yes! To freeze your Easy Turtle Bars, wrap them tightly in plastic wrap and then foil for an airtight seal. They’ll remain fresh for up to 3 months. When you’re ready to enjoy, simply thaw them overnight in the fridge, and if you like them warm, microwave individual pieces for about 10-15 seconds.
What if my caramel layer is too runny or too thick?
Great question! If your caramel is too runny, it may not have been cooked long enough. Simply return it to low heat, stir constantly, and let it bubble for a few more minutes until it thickens. Conversely, if it’s too thick, adding a splash of milk or cream can help loosen it back up for a pourable consistency.
Are there any dietary restrictions to consider with Easy Turtle Bars?
Yes, definitely check for any allergies, especially for those with nut sensitivities. You can make a nut-free version by omitting the pecans. For a dairy-free option, substitute the sweetened condensed milk with coconut cream and choose dairy-free chocolate chips to accommodate different dietary needs.
Can I make these bars in advance?
Very! You can prepare your Easy Turtle Bars up to two days in advance. Just keep them stored properly; this allows the flavors to meld beautifully, making them even more delicious when you’re ready to serve!
Easy Turtle Bars: Indulge in Rich Chocolate Bliss
Ingredients
Equipment
Method
- Preheat your oven to 350°F (175°C). In a mixing bowl, combine cold butter, granulated sugar, and all-purpose flour. Mix until the mixture resembles coarse crumbs, then press firmly into a greased 9x13-inch baking dish to form a crust.
- Bake the crust in your preheated oven for approximately 15 minutes until it turns a light golden brown. Set aside to cool slightly.
- In a medium saucepan over low heat, combine sweetened condensed milk and chopped pecans. Stir constantly for about 5-7 minutes until the mixture begins to bubble and thicken.
- Pour the caramel mixture over the pre-baked crust, spreading it evenly with a spatula.
- In a microwave-safe bowl, heat chocolate chips at 30-second intervals, stirring in between, until completely melted and smooth. Pour the melted chocolate over the caramel layer and spread to cover completely.
- Let the Easy Turtle Bars cool at room temperature for at least 2 hours. For cleaner edges, refrigerate for an hour before slicing.
Leave a Reply