
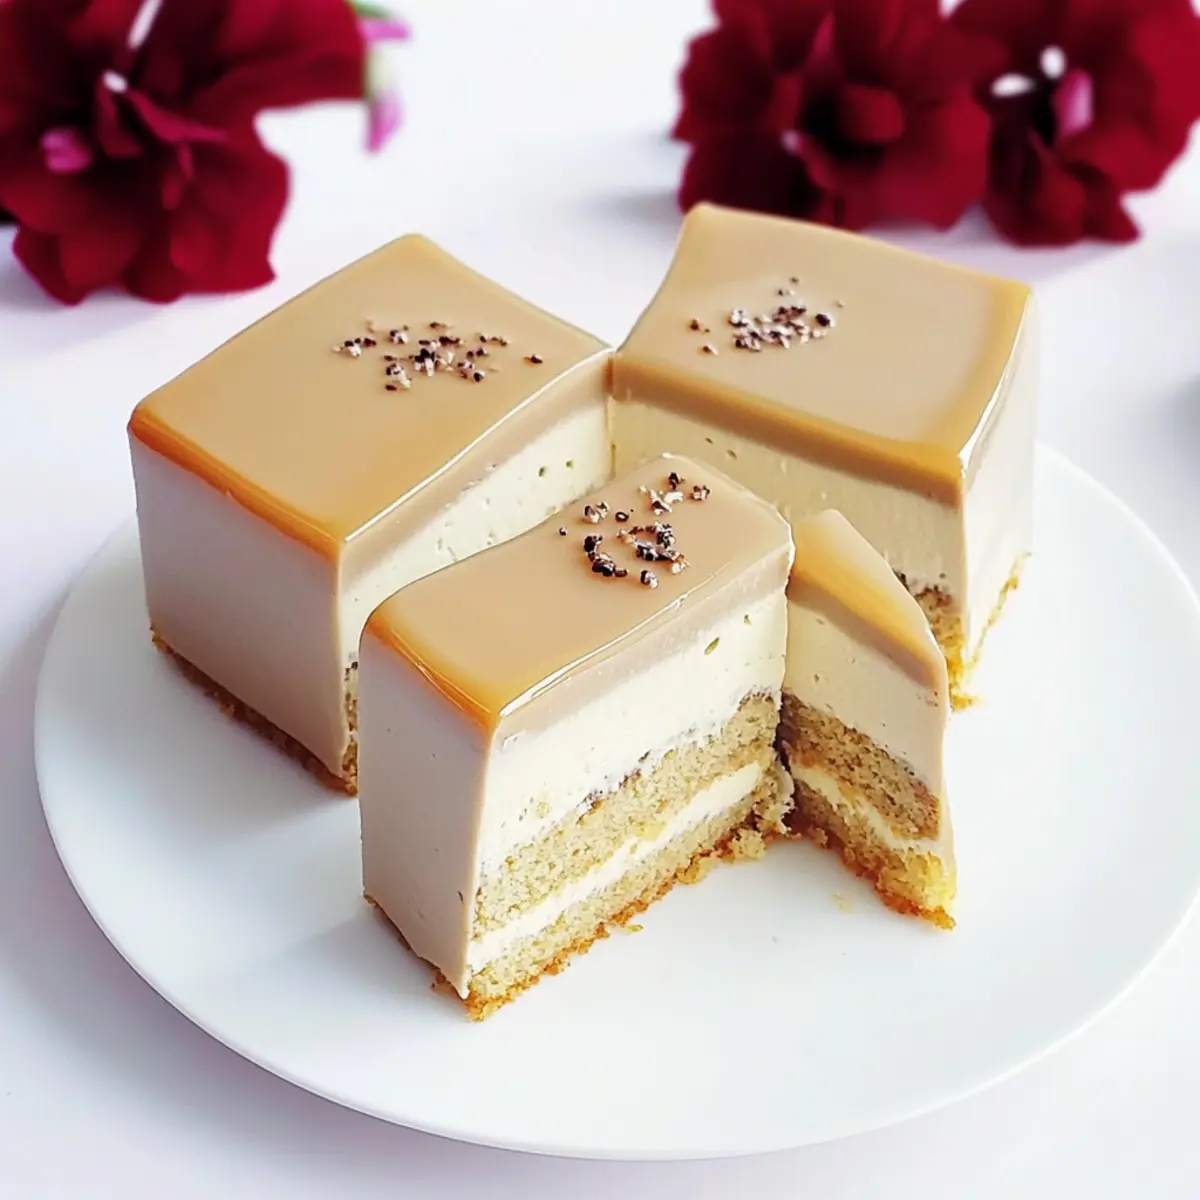
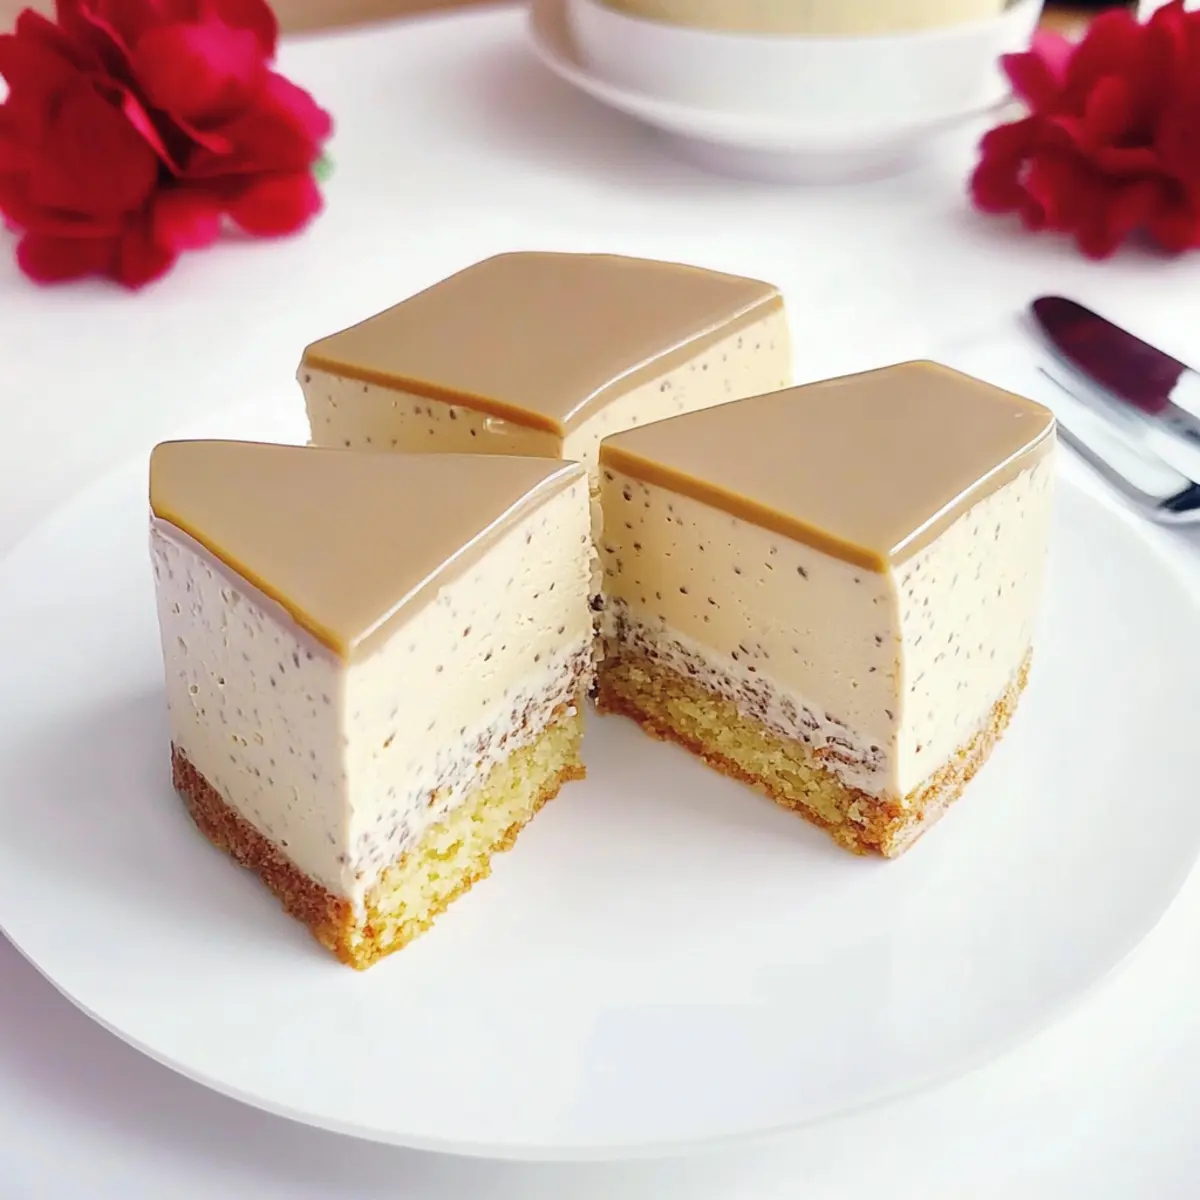
As I sat sipping my afternoon tea, the fragrant aroma of Earl Grey took me on a delightful journey, and I couldn’t help but dream of a dessert that would capture its essence. Enter the No-Bake Earl Grey Mousse Cake — a refined dessert that delights with light and creamy textures, making it perfect for any occasion. With minimal effort and no need for baking, this elegant treat not only elevates your dessert game but also allows you to impress guests without the kitchen chaos. The layers of luscious cream cheese mousse and a buttery biscuit base create a refreshing experience that feels indulgent yet achievable. Ready to explore how to create this sophisticated classic right at home? Let’s get started!
Why is This Cake a Must-Try?
No-Bake Convenience: This recipe is perfect for those who want a stunning dessert without the hassle of baking.
Gourmet Flavor: The delicate Earl Grey tea flavor adds sophistication, transforming an ordinary gathering into a chic affair.
Easy Preparation: With simple steps, even novice cooks can impress friends and family with this elegant mousse.
Versatile Appeal: Serve it at tea parties or as a light finish to a dinner; it fits any occasion effortlessly.
Decadent Texture: Enjoy the smooth, creamy mousse layered with a buttery base, reminiscent of a luxurious cheesecake. Plus, if you’re a fan of fruity desserts, you might love this Blueberry Crumble Cheesecake!
No-Bake Earl Grey Mousse Cake Ingredients
For the Biscuit Base
• Caramel Biscuits – The sweet and sturdy base for your mousse cake; feel free to substitute with digestive biscuits if you prefer.
• Unsalted Butter – Keeps the biscuit crumbs bound together; melting it ensures a perfect mix.
For the Mousse Filling
• Cream Cheese – Forms the luscious mousse layer; remember to soften it to room temperature for easier blending.
• Caster Sugar – Sweetens the mixture; you can use granulated sugar instead if that’s what you have on hand.
• Hot Milk – Essential for dissolving the gelatin and steeping the tea; aim for a temperature around 40°C (104°F) for best results.
• Gelatin Sheets – Provides structure to the mousse cake; if using powdered gelatin, remember to substitute with 1.5 g per sheet.
• Earl Grey Tea Powder – Gives the cake its signature floral flavor; consider swapping it for matcha or jasmine tea for an exciting twist.
• Whipping Cream – Adds lightness and airy texture; whip it to soft peaks for the best results.
For Decoration
• Crushed Caramel Biscuits – Use these to sprinkle on top for added flavor and crunch; adjust the amount based on your preference.
• Earl Grey Tea Bag – Perfect for making an optional glossy mirror glaze; steep it just like the powder, but in liquid form.
Step‑by‑Step Instructions for No-Bake Earl Grey Mousse Cheesecake
Step 1: Prepare Biscuit Base
Start by crushing caramel biscuits into fine crumbs using a food processor or a rolling pin. Combine the crumbs with melted unsalted butter until sandy in texture. Firmly press this mixture into the bottom of a 9-inch springform pan, creating an even layer. Refrigerate the base for 10 minutes to allow it to set and hold together nicely.
Step 2: Make Cheese Mousse
In a mixing bowl, blend softened cream cheese with 10 g of caster sugar until perfectly smooth. Meanwhile, soak the gelatin sheets in cold water for a few minutes, then dissolve them in 80 ml of hot milk, stirring well. Stir in the Earl Grey tea powder and add this mixture to the cream cheese, mixing until fully combined.
Step 3: Whip the Cream
Using a separate bowl, whip the whipping cream to soft peaks, ensuring it’s light and airy but not over-whipped. Gently fold the whipped cream into the cream cheese mixture to maintain its light texture. Once combined, add in the crushed caramel biscuits, mixing just enough to distribute them evenly throughout the mousse.
Step 4: Assemble and Chill
Pour the cheese mousse over the prepared biscuit base in the springform pan. Smooth the top with a spatula for an even finish. Cover the pan with plastic wrap and refrigerate for at least 4 hours, or preferably overnight, allowing the mousse to set completely and develop its flavors.
Step 5: Prepare Optional Earl Grey Mirror Glaze
For an added touch of elegance, prepare the optional mirror glaze by steeping an Earl Grey tea bag in 100 ml of hot milk for 5 minutes. In a small saucepan, mix this infused milk with caster sugar until dissolved, then add the pre-soaked gelatin and stir until fully dissolved. Allow the glaze to cool to room temperature.
Step 6: Finish and Unmold
Once the mousse has set, carefully pour the cooled mirror glaze over the top of the mousse, creating a glossy finish. Return the cake to the refrigerator for an additional 1–2 hours to firm up the glaze. To unmold your No-Bake Earl Grey Mousse Cheesecake, gently run a hairdryer along the edges of the springform pan for easy release.
Step 7: Decorate and Serve
After unmolding, feel free to decorate the top with additional crushed caramel biscuits for added texture and flavor. Cut the cheesecake into slices and serve chilled, showcasing the beautiful layers of creamy mousse and delightful biscuit base to your guests.
No-Bake Earl Grey Mousse Cake Variations
Feel free to let your creativity shine while making this delicious No-Bake Earl Grey Mousse Cake!
-
Floral Twist: Add a splash of rosewater to the cream cheese mixture to introduce an enchanting floral note.
-
Citrus Infusion: Incorporate the zest of lemon or orange into the mousse for a refreshing citrus kick that beautifully complements the Earl Grey.
-
Matcha Magic: Swap out the Earl Grey tea powder for matcha to create a vibrant green mousse with an earthy flavor; it’s both elegant and delicious!
-
Chai Delight: Replace Earl Grey with chai tea for a spiced version that warms the soul; perfect for cozy gatherings.
-
Dairy-Free Delight: Use coconut cream in place of whipping cream and dairy-free cream cheese to create a rich and smooth dairy-free mousse.
-
Nutty Base: Consider using crushed almond or hazelnut biscuits instead of caramel biscuits for a delightful nutty crunch in the base.
-
Fruity Finish: Top your mousse cake with fresh berries like raspberries or strawberries, adding a burst of tartness and color.
-
Decadent Chocolate: For chocolate lovers, fold in some melted dark chocolate into the mousse for an indulgent twist. Serve it alongside a slice of Dark Chocolate Mousse for a double treat.
These variations not only enhance the flavor profile but also allow you to make this cake uniquely yours! Enjoy exploring the possibilities!
Make Ahead Options
These No-Bake Earl Grey Mousse Cakes are a dream for busy home cooks looking to save time without sacrificing flavor! You can prepare the creamy mousse and biscuit base up to 24 hours in advance, allowing the flavors to meld beautifully. Simply crush the caramel biscuits and mix them with melted butter to form the base; refrigerate for 10 minutes. Then create the mousse, pour it over the cooled base, and cover it with plastic wrap before refrigerating for at least 4 hours (or overnight). For the optional glaze, prepare and chill it before pouring over the set mousse whenever you’re ready to serve. This way, you’ll ensure your dessert remains just as delicious while providing maximum convenience on serving day!
Helpful Tricks for No-Bake Earl Grey Mousse Cake
- Softened Cream Cheese: Always ensure cream cheese is fully softened to room temperature to prevent lumps, leading to a creamy texture in your no-bake Earl Grey mousse.
- Whip Carefully: When whipping the cream, stop when you achieve soft peaks. Over-whipping can result in a grainy texture; remember, we want lightness!
- Gelatin Precision: If using powdered gelatin, dissolve it in a small amount of cold water before adding it to the warm mixture. This helps it blend smoothly without clumps.
- Glaze Timing: If making the optional mirror glaze, let it cool to room temperature before pouring it over the mousse to prevent melting the soft layers below.
- Chill Time: Be patient! Allow the mousse to chill overnight for the best flavor and texture development. The longer the mousse sets, the more delightful it will be!
Storage Tips for No-Bake Earl Grey Mousse Cake
Fridge: Store your No-Bake Earl Grey Mousse Cake in the refrigerator, covered with plastic wrap or an airtight container, for up to 3 days to maintain its freshness and texture.
Freezer: It is not recommended to freeze this mousse cake, as the delicate texture may suffer upon thawing, resulting in a less enjoyable experience.
Reheating: There’s no need to reheat this dessert; simply slice and serve chilled straight from the fridge for the best experience.
Serving Suggestions: After chilling, feel free to garnish with extra crushed caramel biscuits or a sprig of mint before serving to enhance the presentation.
What to Serve with No-Bake Earl Grey Mousse Cake
As you prepare to indulge in the creamy delight of this elegant dessert, consider these delightful pairings that elevate your dining experience.
-
Fresh Berries: Adding a burst of tartness, fresh berries such as raspberries or blueberries create a wonderful contrast to the creamy mousse.
-
Whipped Cream: A dollop of freshly whipped cream enhances the lightness of the mousse, creating a luxurious serving while adding a touch of richness.
-
Herbal Tea: Complement the Earl Grey flavor with a cup of soothing herbal tea, such as chamomile, which allows the floral notes of the dessert to shine.
-
Lemon Sorbet: This refreshing sorbet serves as a palate cleanser, perfectly offsetting the creaminess of the mousse with its bright citrus flavor.
-
Chocolate Truffles: Rich, dark chocolate truffles make a decadent addition, contrasting the delicate tea flavors while offering a hint of indulgence.
-
Pistachio Cookies: The nutty crunch of pistachio cookies not only adds texture but also a delightful flavor that pairs beautifully with the mousse’s floral notes.
-
Sparkling Wine: A glass of chilled sparkling wine adds a celebratory touch, allowing the dessert to shine as the star of your dinner gathering.
-
Citrus Salad: A light salad of citrus fruits balances sweetness from the mousse, bringing freshness that draws out deeper flavors from the Earl Grey.
These delightful accompaniments will not only enhance the indulgence of your No-Bake Earl Grey Mousse Cake but also create a memorable dining experience that your guests will cherish.

No-Bake Earl Grey Mousse Cake Recipe FAQs
What type of biscuits work best for the base?
For the base of this no-bake Earl Grey mousse cake, caramel biscuits provide the perfect sweetness and structure. If you can’t find caramel biscuits, digestive biscuits work wonderfully as a substitution while keeping the delightful flavor profile.
How do I store the mousse cake, and how long will it last?
Absolutely! You can store your No-Bake Earl Grey Mousse Cake in the refrigerator for up to 3 days. Make sure to cover it with plastic wrap or place it in an airtight container to preserve its freshness. Try to avoid freezing this dessert, as the texture might be compromised after thawing.
Can I freeze the No-Bake Earl Grey Mousse Cake?
I wouldn’t recommend freezing this mousse cake. The creamy texture may become grainy upon thawing, diminishing your pleasant experience. Instead, embrace its deliciousness fresh from the refrigerator — the flavors and textures are best that way!
What should I do if my mousse isn’t setting properly?
If you find that your mousse is not setting, it might be due to not dissolving the gelatin correctly or not allowing enough chill time. Ensure that gelatin sheets are fully soaked and dissolved in hot milk before mixing it into the cream cheese. Remember to chill it for at least 4 hours or overnight for the best results. If you desire a firmer texture, you can increase the gelatin slightly the next time you make it.
Are there any dietary considerations for this recipe?
Of course! If you have guests with dietary restrictions, consider using dairy-free cream cheese and coconut cream instead of traditional dairy ingredients. Also, ensure that the biscuits are suitable for their diet; some brands offer gluten-free options if needed. Always check labels to avoid allergens!

Silky No-Bake Earl Grey Mousse Cheesecake for Elegance
Ingredients
Equipment
Method
- Crush caramel biscuits into fine crumbs. Combine with melted unsalted butter and press into the bottom of a springform pan. Refrigerate for 10 minutes.
- Blend softened cream cheese with caster sugar until smooth. Soak gelatin sheets in cold water, then dissolve in hot milk. Stir in Earl Grey tea powder and combine with cream cheese.
- Whip the whipping cream to soft peaks and gently fold into the cream cheese mixture along with the crushed caramel biscuits.
- Pour the cheese mousse over the biscuit base, smooth the top, and refrigerate for at least 4 hours or overnight.
- For the optional mirror glaze, steep an Earl Grey tea bag in hot milk, dissolve caster sugar, and add pre-soaked gelatin. Cool to room temperature.
- Pour the cooled mirror glaze over the set mousse and refrigerate for an additional 1-2 hours.
- Unmold the cheesecake, decorate with crushed caramel biscuits, slice, and serve chilled.
Leave a Reply