
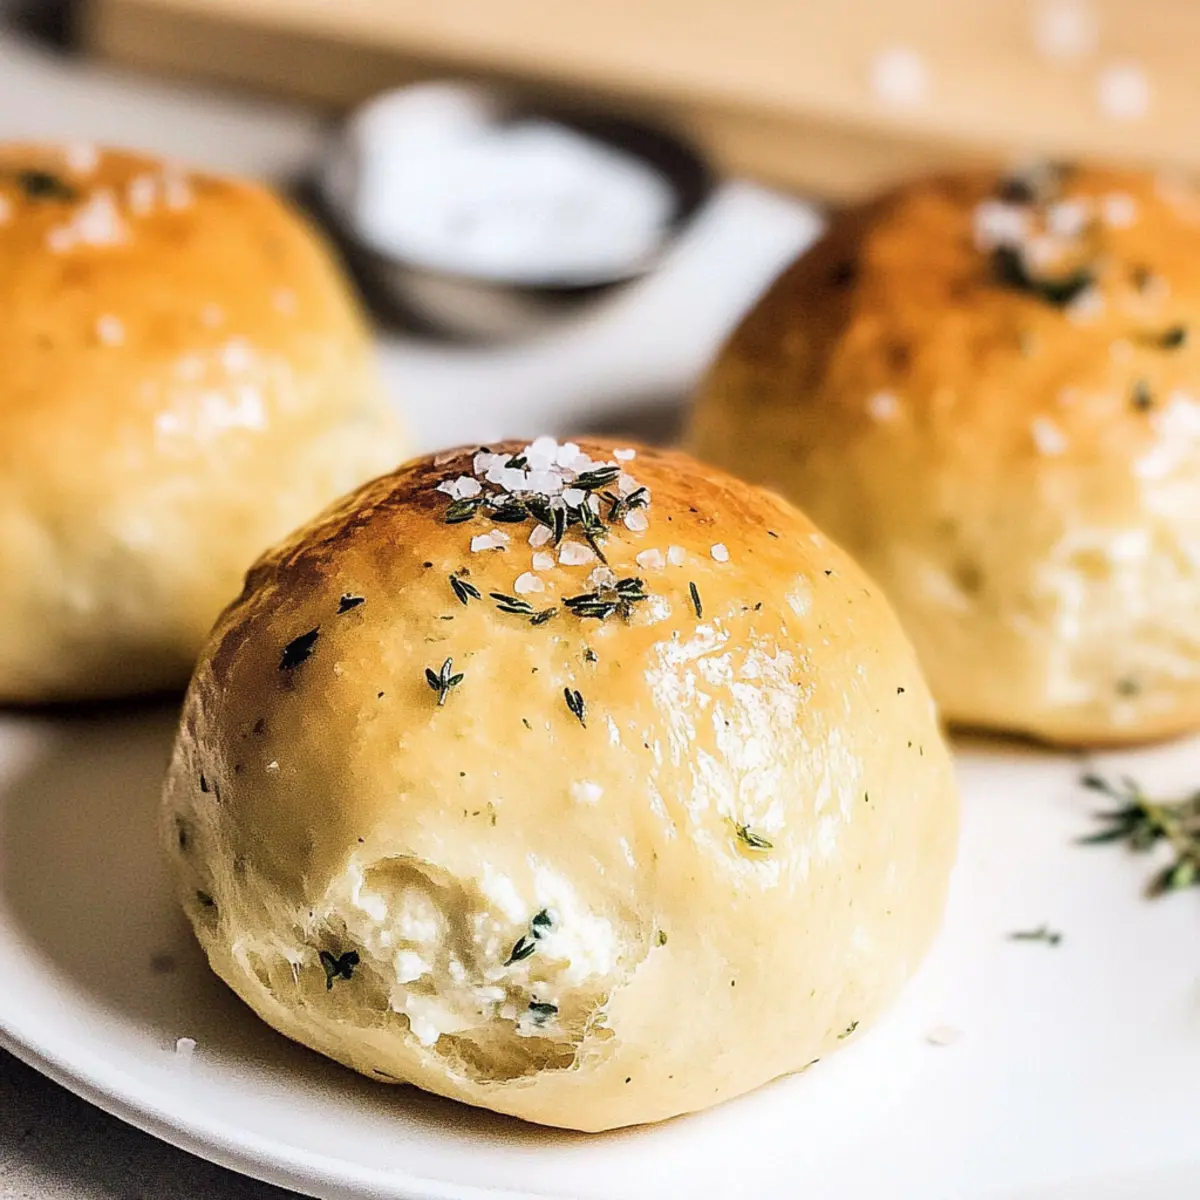
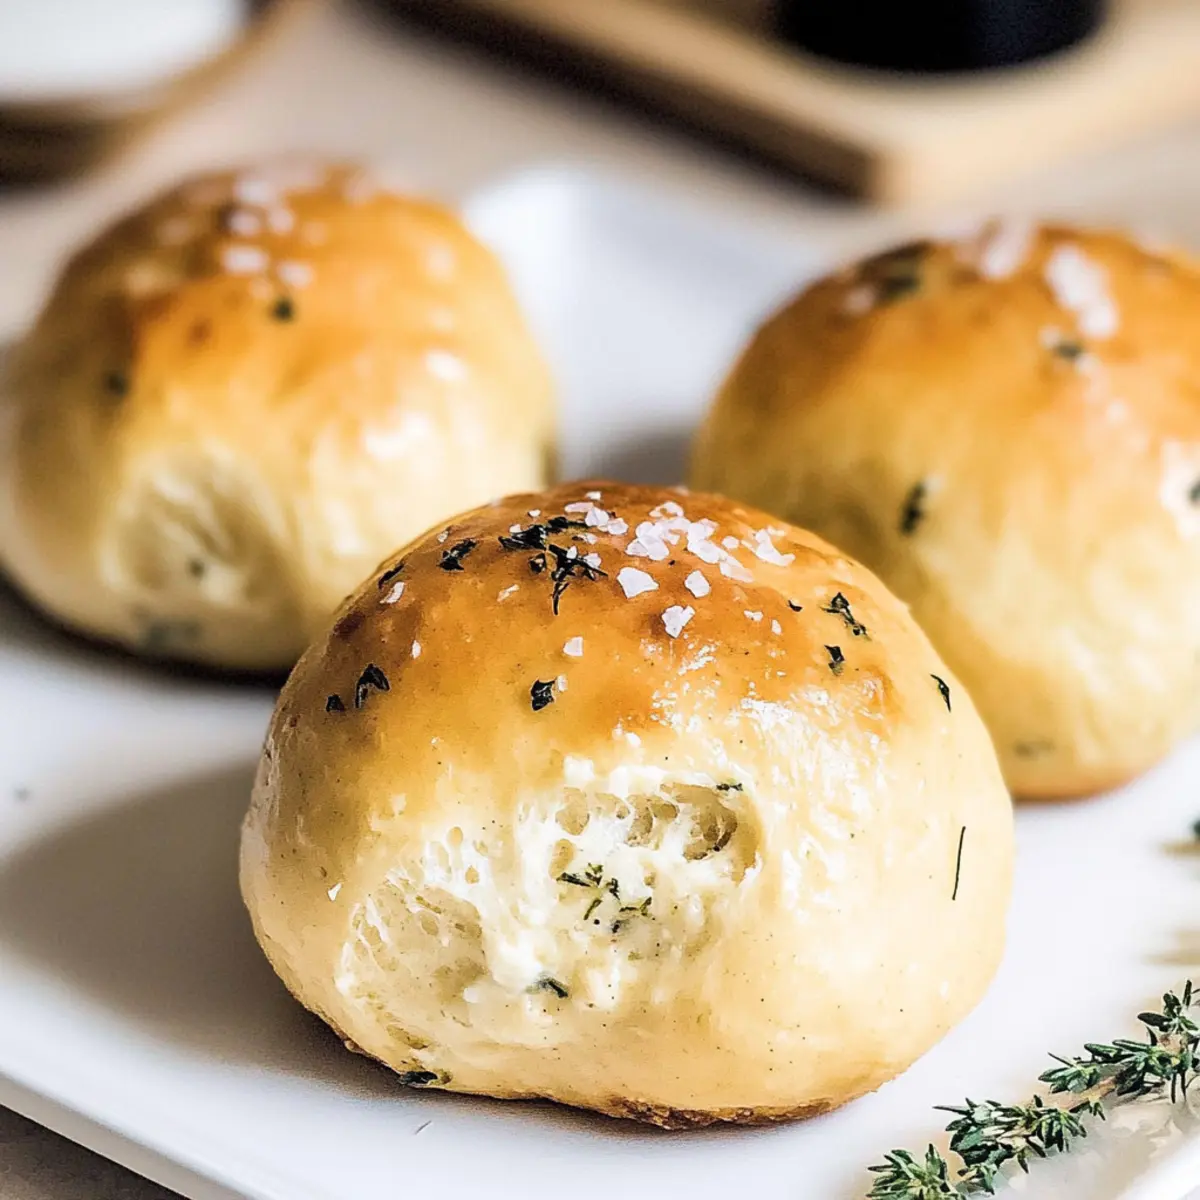
The warm, inviting aroma of fresh bread filling the kitchen—it’s an experience that brings back cherished moments spent with loved ones around the dinner table. Today, I’m excited to share my recipe for Ricotta Herb Bread Rolls, a delightful treat that will elevate your meals from ordinary to extraordinary. Not only are these rolls incredibly soft and pillowy, but they also offer a unique twist with the earthy notes of fresh herbs. They’re perfect for any occasion, whether you’re hosting a family gathering or simply craving a comforting homemade side. Plus, the quick preparation makes it easy to whip them up when time is of the essence. Are you ready to let the magic of these Ricotta Herb Bread Rolls transform your next dinner?
Why Choose Ricotta Herb Bread Rolls?
Irresistible Softness: Each bite of these rolls is a melt-in-your-mouth experience, thanks to the creamy ricotta that keeps them tender and fluffy.
Aromatic Flavor: Fresh herbs elevate the taste, making these rolls a perfect accompaniment to any meal or stand-alone snack.
Versatile Pairing: Whether served with roasted meats or enjoyed with butter and jam for breakfast, their adaptability is endless!
Quick & Easy: With simple ingredients and straightforward steps, these rolls come together quickly, even on a busy weeknight.
Crowd-Pleaser: Impress family and friends with homemade goodness that feels special without the fuss. For more delicious bread ideas, check out these Chai Cinnamon Rolls that are perfect for brunch!
Ricotta Herb Bread Rolls Ingredients
For the Dough
• Warm Whole Milk (100 to 110°F) – Adds moisture and helps activate the yeast; feel free to substitute with any warm unsweetened milk alternative.
• Part Skim Ricotta Cheese (1 cup) – Provides richness and tenderness in the rolls; for a creamier texture, opt for whole-milk ricotta.
• Olive Oil (2 tablespoons, divided) – Adds flavor and improves the dough’s texture; melted butter makes an excellent substitute.
• Whole Eggs (2) – Binds the dough and enhances richness; for a vegan version, use flaxseed meal mixed with water.
• Granulated Sugar (1 teaspoon) – Activates yeast and balances flavors; you can omit it for a less sweet roll.
• Fine Sea Salt (1.5 teaspoons) – Enhances flavor; keep the dosage as is since salt moderates yeast activity.
• Minced Fresh Rosemary (1 tablespoon) – Imparts an earthy flavor; feel free to swap with thyme or sage for variety.
• Minced Fresh Thyme (1 tablespoon) – Adds an aromatic note; you can skip it if you prefer other herbs instead.
• Instant Yeast (2 1/4 teaspoons – 1 packet) – Leavens the rolls quickly without proofing; active dry yeast works too, but it must be proofed in warm water first.
• All-Purpose Flour (3 ½ to 4 cups) – Forms the main structure; adjust based on how the dough feels, and you can experiment with gluten-free flour as well, though results may vary.
• Flake Sea Salt (for sprinkling) – Adds texture and a burst of flavor; this step is optional.
Embrace the delightful experience of making Ricotta Herb Bread Rolls with these simple yet essential ingredients, setting the stage for a cozy meal that’s sure to become a family favorite!
Step‑by‑Step Instructions for Ricotta Herb Bread Rolls
Step 1: Mix Wet Ingredients
In a large mixing bowl, combine 1 cup of warm whole milk (about 100 to 110°F), 1 cup of part skim ricotta cheese, 2 whole eggs, 1 tablespoon olive oil, and 1 teaspoon granulated sugar. Whisk the mixture until it’s smooth and well blended. You should see a creamy consistency that invites the dry ingredients for a delicious journey ahead.
Step 2: Add Dry Ingredients
Stir in 2 1/4 teaspoons of instant yeast, 1.5 teaspoons of fine sea salt, and 1 tablespoon each of minced fresh rosemary and thyme. Gradually add 3 ½ to 4 cups of all-purpose flour, mixing until a soft dough forms. The dough should be slightly sticky but manageable, signaling that it’s ready for kneading.
Step 3: Knead the Dough
Transfer the dough onto a well-floured surface and knead for 5 to 7 minutes, until it becomes smooth and elastic. As you work, enjoy the blend of fragrant herbs and rich ricotta being incorporated. The dough should spring back when poked gently, indicating it’s perfectly kneaded and ready for the next step.
Step 4: First Rise
Place the kneaded dough in a lightly greased bowl, ensuring it’s covered with a damp cloth or plastic wrap. Allow it to rise in a warm spot for about 1.5 to 2 hours, until it has doubled in size. You’ll notice it expanding significantly, which is a beautiful sight in the making of your Ricotta Herb Bread Rolls.
Step 5: Shape Rolls
Once risen, gently punch down the dough to release air, then divide it into equal portions. Shape each piece into a ball and arrange them on a baking sheet lined with parchment paper. Leave some space between the rolls, as they will grow even more during the second rise, creating that delightful pillowy texture.
Step 6: Second Rise
Cover the shaped rolls with a damp kitchen towel and let them rise for another hour, until puffy and well-rounded. This step is essential to achieve the light texture characteristic of Ricotta Herb Bread Rolls. Prepare to enjoy their inviting aroma while they rise.
Step 7: Preheat Oven
While the rolls are rising, preheat your oven to 375°F (190°C). This ensures your oven is perfectly hot when it’s time to bake. As you wait, you can marvel at how much your dough has grown, promising a tasty end product.
Step 8: Prepare for Baking
Once the second rise is complete, gently brush the tops of the rolls with the remaining tablespoon of olive oil. For an extra touch, sprinkle some flaky sea salt on top. These steps enhance both the flavor and visual appeal of your Ricotta Herb Bread Rolls, making them even more tempting.
Step 9: Bake
Carefully place the baking sheet in the preheated oven and bake the rolls for 25 to 30 minutes. Keep an eye on them as they transform into golden brown pillows of delight. They are ready when they sound hollow when tapped lightly on the bottom, promising a satisfying texture within.
Step 10: Cool & Serve
Allow the Ricotta Herb Bread Rolls to cool slightly on a wire rack, just enough to handle. Serve them warm, perhaps with a pat of butter. Those fragrant rolls are now ready to complement your meals and become a cherished part of your family gatherings!
Expert Tips for Ricotta Herb Bread Rolls
-
Measure Precisely: Using a kitchen scale can help ensure your ingredients are accurate, leading to consistently perfect Ricotta Herb Bread Rolls every time.
-
Temperature Matters: Bring ricotta and eggs to room temperature for a smoother batter. Cold ingredients can lead to uneven mixing.
-
Gradual Flour Addition: Add flour bit by bit to avoid a dry dough. The dough should be slightly sticky but manageable, which is key for pillowy texture.
-
Check for Ripeness: Conduct the “ripe test” after the first rise by gently poking the dough; if it springs back slowly, it’s ready for shaping into rolls.
-
Make Ahead Strategy: You can shape the rolls and keep them in the fridge for up to 24 hours before baking. Just allow them to come to room temperature prior to baking for the best results.
Storage Tips for Ricotta Herb Bread Rolls
-
Room Temperature: Store the rolls in an airtight container at room temperature for up to 2 days to maintain their softness and flavor.
-
Fridge: If you need them to last longer, place the airtight container in the fridge for up to 4 days, but note that they may become slightly denser.
-
Freezer: For long-term storage, freeze the rolls for up to 2 months. Make sure to wrap them individually in plastic wrap and then place them in a freezer-safe bag.
-
Reheating: To enjoy, simply thaw the rolls at room temperature or microwave them for 10-15 seconds. For a crispy outer texture, warm them in the oven at 350°F (175°C) for about 5-8 minutes. Enjoy your delightful Ricotta Herb Bread Rolls!
Make Ahead Options
These Ricotta Herb Bread Rolls are fantastic for busy cooks looking to simplify meal prep! You can shape the rolls and store them in the refrigerator for up to 24 hours before baking. After the second rise, simply cover them tightly with plastic wrap or a damp cloth to prevent drying out. When you’re ready to bake, allow the rolls to come to room temperature for about 30 minutes before brushing them with olive oil and sprinkling with flaky sea salt. This approach ensures your homemade Ricotta Herb Bread Rolls are just as delicious and fluffy, making for a perfect, stress-free addition to your meals.
Ricotta Herb Bread Rolls Variations
Feel free to explore these delicious alterations and tailor the Ricotta Herb Bread Rolls to your taste buds!
-
Cottage Cheese: Substitute ricotta with cottage cheese for a delightful texture. Just be sure to drain excess whey for the best outcome!
-
Dried Herbs: Swap fresh herbs for dried varieties, remembering that dried herbs pack a stronger punch—adjust to your liking with a bit of experimentation.
-
Cheesy Goodness: Incorporate crumbled feta or grated parmesan into the dough for a salty flavor boost that beautifully complements the herbs.
-
Garlic Infusion: Mix in minced garlic or garlic powder for an aromatic twist that adds a lovely depth of flavor. Your kitchen will smell divine!
-
Spicy Kick: For a zesty edge, add a pinch of red pepper flakes or finely chopped jalapeños. This will elevate your rolls with just the right amount of heat.
-
Sweet Twist: Introduce a hint of honey or sugar for a touch of sweetness, making these rolls perfect for breakfast with butter and jam or a favorite spread.
-
Whole Wheat: For a healthier spin, use whole wheat flour instead of all-purpose. It adds a nutty flavor and a hearty texture that many will enjoy.
-
Flavor Infusion: Brush the tops with garlic butter before baking for an irresistible, savory finish. Pair these with a rich Whipped Ricotta Honey Toast for an uptown brunch experience that truly impresses!
Feel inspired? Whichever variation you choose, these Ricotta Herb Bread Rolls will surely become a cherished addition to your dining table!
What to Serve with Ricotta Herb Bread Rolls
Imagine a delightful dining experience where every bite of your meal is enhanced by fluffy bread, inviting warmth, and a medley of flavors.
- Creamy Garlic Mashed Potatoes: These rich and buttery potatoes add a comforting touch that perfectly complements the soft texture of the rolls.
- Herb-Roasted Chicken: The savory, herb-infused chicken echoes the fresh flavors in the rolls, creating a cohesive dining experience. A match made in culinary heaven!
- Mixed Green Salad: Crisp greens with a tangy vinaigrette provide a refreshing contrast to the rolls’ richness, balancing the meal beautifully.
- Grilled Vegetables: Smoky and sweet, grilled veggies are a colorful side that adds a burst of flavor and texture alongside your soft rolls to elevate your meal.
- Homemade Tomato Soup: This classic pairing allows you to dip those pillowy rolls for an unforgettable comfort food experience.
- Cheese Platter: A selection of cheeses offers variety and indulgence, making every bite an adventurous exploration of flavors.
- Chardonnay: Sipping on this crisp white wine enhances the meal, its acidity cutting through the richness of the rolls and harmonizing the flavors.
- Dark Chocolate Mousse: For dessert, this silky treat provides the perfect sweet ending after the savory delight of your Ricotta Herb Bread Rolls.
Ricotta Herb Bread Rolls Recipe FAQs
What type of milk should I use for the dough?
I recommend using warm whole milk heated to 100 to 110°F for activating the yeast and adding moisture. If you prefer a dairy-free option, any warm unsweetened milk alternative will work well too!
How should I store the Ricotta Herb Bread Rolls?
Store your rolls in an airtight container at room temperature for up to 2 days for optimal freshness. You can also refrigerate them for up to 4 days—just keep in mind they may lose some softness.
Can I freeze Ricotta Herb Bread Rolls?
Absolutely! To freeze, first wrap each roll individually in plastic wrap, then place them in a freezer-safe bag. They can be stored for up to 2 months. To enjoy later, simply thaw at room temperature or reheat them in the oven for a few minutes.
What should I do if my dough doesn’t rise properly?
If your dough doesn’t rise, it could be due to inactive yeast. Check the expiration date on your yeast. Next time, try proofing the yeast in warm water and sugar for a few minutes—bubbles indicate it’s active! If the dough feels too dry, a splash of warm water while kneading can help achieve the right consistency.
Are there any dietary considerations for my Ricotta Herb Bread Rolls?
If you’re looking for a vegan alternative, you can substitute the ricotta with silken tofu and the eggs with a flaxseed meal mixed with water (1 tablespoon flaxseed meal + 2.5 tablespoons water per egg). This will help you create a delicious vegan version of these delightful rolls!
What’s the best way to know when my rolls are done baking?
A great indicator is the sound! When they are golden brown and sound hollow when tapped, they’re ready. Another tip is to look for a slight crust and a soft texture. Letting them cool before serving will also enhance their flavor!
Savory Ricotta Herb Bread Rolls That Melt in Your Mouth
Ingredients
Equipment
Method
- Mix Wet Ingredients: In a large mixing bowl, combine warm whole milk, part skim ricotta cheese, whole eggs, olive oil, and granulated sugar. Whisk until smooth and creamy.
- Add Dry Ingredients: Stir in instant yeast, fine sea salt, minced fresh rosemary, and thyme. Gradually mix in all-purpose flour until a soft dough forms.
- Knead the Dough: Transfer the dough onto a floured surface and knead for 5 to 7 minutes until smooth and elastic.
- First Rise: Place kneaded dough in a greased bowl, cover with a damp cloth, and let rise for 1.5 to 2 hours until doubled in size.
- Shape Rolls: Punch down the dough, divide into equal portions, shape into balls, and place on a lined baking sheet.
- Second Rise: Cover shaped rolls with a towel and let rise for another hour until puffy.
- Preheat Oven: While rolls are rising, preheat the oven to 375°F (190°C).
- Prepare for Baking: Brush tops with remaining olive oil and optionally sprinkle flaky sea salt.
- Bake: Bake for 25 to 30 minutes until golden brown and hollow-sounding when tapped.
- Cool & Serve: Allow to cool on a wire rack briefly, then serve warm.
Leave a Reply