
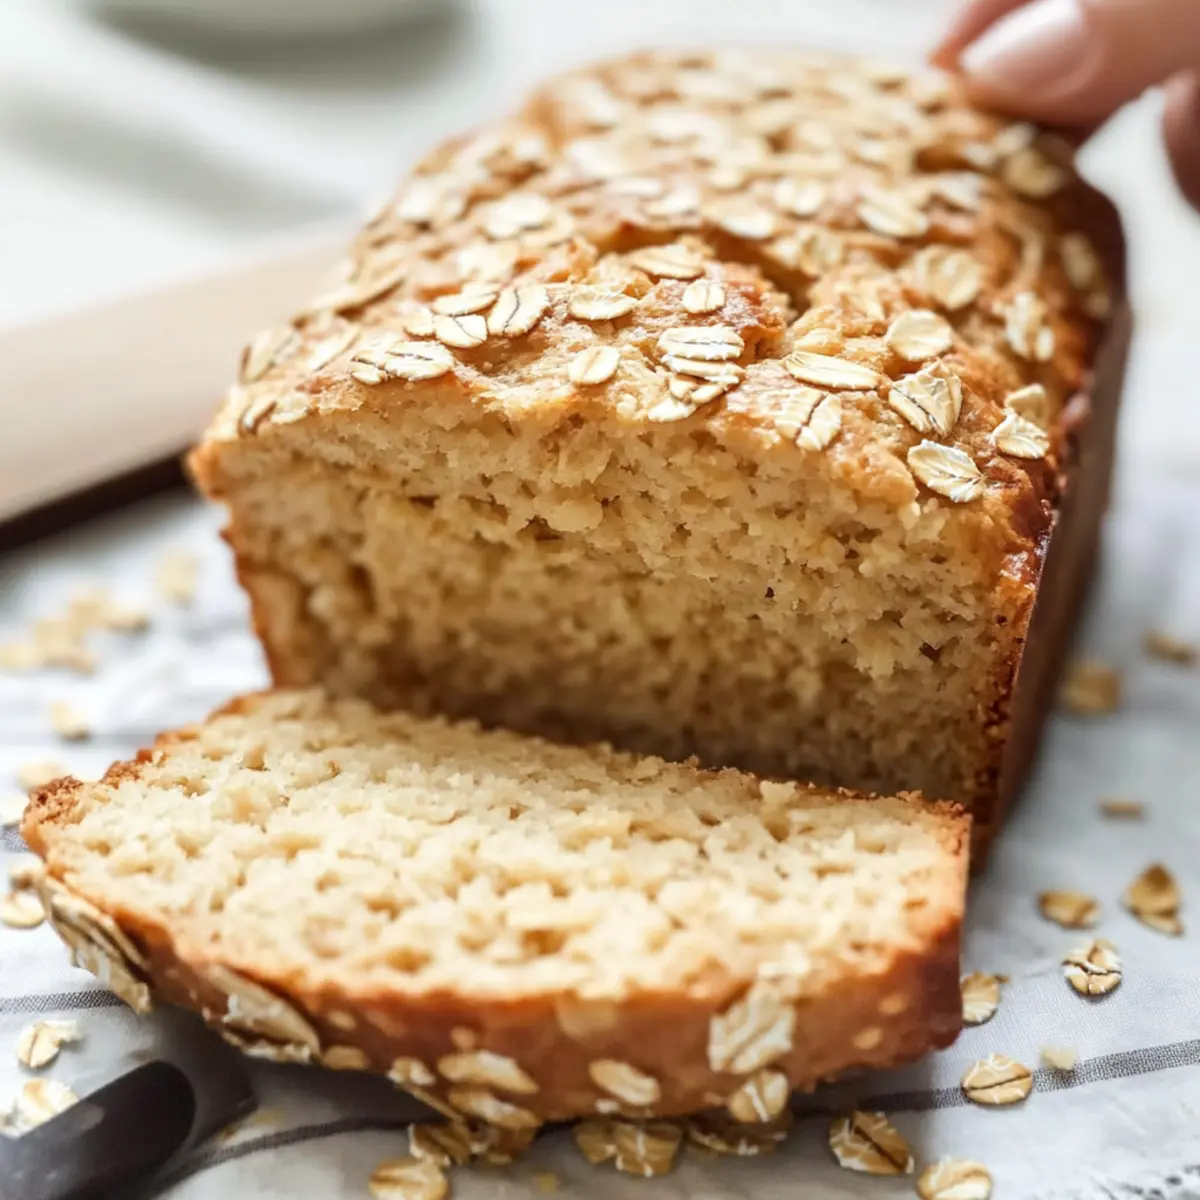
As I was rummaging through my pantry the other day, I stumbled upon an unopened bag of rolled oats, just waiting to bring a bit of magic into my kitchen. That’s when I knew it was time to whip up a loaf of Easy Honey Oat Bread. This delightful quick bread not only highlights the nutty goodness of oats but also offers a touch of sweetness from honey, making it a comforting choice for any meal. What’s even better? It’s gluten-free and can be dairy-free too, accommodating various dietary needs while keeping things simple and delicious. With no yeast required, this bread bakes up soft, fluffy, and perfect for toasting or snacking. Are you ready to discover how easy it is to create a homemade loaf that the whole family will love? Let’s dive in!
Why You’ll Love Honey Oat Bread
Moist and Fluffy: This Easy Honey Oat Bread is a game changer with its tender, moist interior – perfect for breakfast, snacks, or anytime you crave something comforting.
Quick and Simple: No yeast means no waiting! With just a few simple steps, you can whip this up in no time.
Versatile: Whether you enjoy it warm with a smear of butter or toasted with jam, this bread is incredibly adaptable! Enhance the flavors by swapping honey with maple syrup or adding nuts for crunch.
Diet-Friendly: It’s gluten-free and can easily be made dairy-free, making it suitable for various dietary preferences. Pair it with your favorite beverage and you have a satisfying treat!
Family Favorite: Everyone loves a homemade loaf, and this recipe delivers flavor and comfort that will have your loved ones asking for seconds. Don’t forget a bite of this alongside your favorite tea or coffee from time to time!
Honey Oat Bread Ingredients
For the Bread
• Gluten-Free Flour – Provides structure; opt for a blend like Cup4Cup for best results.
• Xanthan Gum – Acts as a binding agent; essential if your gluten-free flour lacks it.
• Baking Powder – Leavening agent for rise; double-check that it’s gluten-free if needed.
• Greek Yogurt – Adds moisture and binds the ingredients; swap for dairy-free yogurt for a dairy-free option.
• Egg – Binds the mixture and adds lift; use an egg replacer or aquafaba for an egg-free alternative.
• Coconut Oil – Provides moisture with a neutral flavor; melted butter can be substituted if dairy is fine.
• Honey – Adds natural sweetness; feel free to experiment with agave or maple syrup instead.
• Rolled Oats – Offers texture and heartiness; ensure they’re labeled gluten-free if necessary.
• Almond Milk – Adds moisture; substitute with another unsweetened non-dairy milk or regular milk.
Step‑by‑Step Instructions for Honey Oat Bread
Step 1: Preheat and Prepare
Begin by preheating your oven to 375°F (190°C). While the oven warms up, take a 9×5-inch loaf pan and grease it lightly with coconut oil or butter. For easy removal later, line the bottom with parchment paper, allowing some overhang for easy lifting. This fundamental preparation step ensures your Honey Oat Bread will bake evenly and come out effortlessly later on.
Step 2: Whisk Dry Ingredients
In a large mixing bowl, whisk together the gluten-free flour, baking powder, xanthan gum, and a pinch of salt. This blend of ingredients will provide the structure and rise necessary for your Honey Oat Bread. Ensure there are no lumps in your flour mix, as this will affect the texture of the final loaf. Set the bowl aside as you move on to the wet ingredients.
Step 3: Mix Wet Ingredients
In another bowl, combine the egg, Greek yogurt, melted coconut oil, and honey into a smooth mixture. Stir everything together with a whisk until the ingredients are well blended. Gradually pour in the almond milk, continuing to mix until the wet ingredients are harmonious. The consistency should be creamy and slightly thick, making it perfect for combining with the dry mix next.
Step 4: Combine Ingredients
Now, pour the wet mixture into the bowl with the dry ingredients. Use a spatula or wooden spoon to gently fold the ingredients together, being careful not to overmix. You want to combine them just until there are no dry flour pockets remaining. The Honey Oat Bread batter will be thick, which is exactly what you want for that lovely, moist texture.
Step 5: Prepare for Baking
Spoon the batter into your prepared loaf pan, spreading it evenly. For a little extra texture and presentation, sprinkle some rolled oats on top of the batter. This step not only adds visual appeal but also enhances the nutty flavor that complements the sweetness of honey. Smooth the top of the batter to ensure even baking.
Step 6: Bake the Bread
Place the loaf pan in the preheated oven and bake for 30-45 minutes. Keep an eye on it as it bakes; the bread should rise and turn a beautiful golden brown. To test for doneness, insert a toothpick into the center of the loaf; it should come out clean or with just a few moist crumbs attached. If needed, tent the bread with aluminum foil if it begins to brown too fast.
Step 7: Cool and Serve
Once the bread has baked to perfection, remove it from the oven and let it cool in the pan for about 10 minutes. Carefully lift the Honey Oat Bread out using the parchment paper overhang and place it on a wire rack to cool completely. This cooling step is vital to ensure the texture sets up nicely, making slicing easier. After cooling, brush the top lightly with honey for an extra touch of sweetness before slicing and serving.
Expert Tips for Honey Oat Bread
-
Proper measuring: Use a kitchen scale to weigh your gluten-free flour for the best results. Incorrect measurements can lead to a dense loaf.
-
Avoid overmixing: Gently fold the wet and dry ingredients together until just combined. Overmixing can lead to a tough texture, ruining your Honey Oat Bread.
-
Watch the bake time: Keep an eye on the bread towards the end of baking. If it browns too quickly, tent it with aluminum foil to prevent burning.
-
Cool completely: Let the bread cool entirely before slicing. This helps set the texture and prevents it from being gummy in the middle.
-
Storage tips: Wrap any leftovers in plastic wrap or store them in an airtight container to maintain freshness for up to 5 days.
Honey Oat Bread Variations
Feel free to get creative with this recipe and make it your own, giving it a unique twist that delights your taste buds!
-
Gluten-Free Option: Use a high-quality gluten-free flour blend for a bread everyone can enjoy. Many gluten-free flour choices also contain xanthan gum, which is perfect for binding.
-
Dairy-Free Option: Swap Greek yogurt for plant-based yogurt and almond milk for any unsweetened non-dairy milk. The bread will remain moist while accommodating dairy-free diets.
-
Maple Magic: Replace honey with maple syrup for a different flavor profile. The subtle maple notes pair beautifully with the oats, making each bite a cozy hug!
-
Nutty Crunch: Add 1/2 cup of chopped nuts such as walnuts or pecans to the batter for an extra crunch. They not only elevate the texture but also bring healthy fats and nutrients.
-
Fruit Infusion: Toss in a handful of dried fruits like cranberries or raisins for a hint of sweetness. They’ll plump up during baking, adding pops of flavor.
-
Warm & Spicy: Add a teaspoon of cinnamon or nutmeg to the dry ingredients for a warm spiced flavor. It’s a wonderful way to bring in those cozy fall vibes any time of year!
-
Seed Power: Sprinkle chia seeds or flaxseeds into the batter for an extra nutritional boost. These small additions offer fiber and essential omega-3 fatty acids.
-
Herbaceous Delight: Experiment by mixing in some fresh herbs like rosemary or thyme for a savory twist. This variant makes a great accompaniment to soups or salads.
If you’re looking for even more inspiration, try pairing this delicious Honey Oat Bread with some lovely whipped ricotta honey for a divine experience, or enjoy it alongside a slice of Ricotta Herb Bread for an extra flavor punch.
How to Store and Freeze Honey Oat Bread
Fridge: Store leftover Honey Oat Bread in an airtight container or wrap it in plastic wrap for up to 5 days to maintain its freshness and moisture.
Freezer: For longer storage, slice the bread and place it in a freezer-safe bag or container. It will stay fresh in the freezer for up to 3 months, ideal for quick snacks later.
Thawing: To enjoy, simply take a slice from the freezer and let it thaw at room temperature or toast directly from frozen for a warm treat.
Reheating: If you want to refresh the bread, pop it in the toaster or a warm oven for a couple of minutes before serving.
Make Ahead Options
These Easy Honey Oat Bread preparations are perfect for busy home cooks looking to save time! You can mix your dry ingredients (gluten-free flour, baking powder, xanthan gum, and salt) up to 24 hours in advance, storing them in an airtight container to keep them fresh. Additionally, you can prepare the wet mixture (egg, Greek yogurt, melted coconut oil, honey, and almond milk) and refrigerate it for up to 3 days. When you’re ready to bake, simply combine the wet and dry ingredients, pour the batter into the loaf pan, and don’t forget to sprinkle the top with oats. This way, you’ll enjoy delicious, fresh-baked Honey Oat Bread with minimal effort, just when you need it!
What to Serve with Easy Honey Oat Bread
Imagine delightfully pairing your warm, homemade bread with these delicious accompaniments, transforming a simple slice into an exquisite dining experience.
-
Creamy Avocado Spread: This rich and buttery topping complements the honey sweetness, adding creaminess that elevates each bite. Just mash ripe avocado with a pinch of salt and a squeeze of lime for an invigorating twist.
-
Fresh Fruit Salad: A medley of seasonal fruits like berries, mangoes, and citrus adds a refreshing contrast, balancing the bread’s sweetness. The vibrant colors and textures will have you digging in for more!
-
Herbed Cream Cheese: Spread a layer of herbed cream cheese for a flavorful pairing that introduces a savory note. Blending chives, dill, and a hint of garlic creates a delightful harmony with each slice.
-
Honey Butter: Mix softened butter with honey for a truly decadent treat. The creamy sweetness melts beautifully on warm bread, making every bite feel like a warm hug.
-
Savory Soup: Serve your Honey Oat Bread alongside a bowl of hearty vegetable or tomato soup. This comforting duo warms the soul and provides a wonderful texture contrast.
-
Nutty Trail Mix: For a quick snack, enjoy a handful of nutty trail mix. The crunchiness and variety of flavors make each bite of bread even more enticing!
Each of these pairings brings its own unique flair, enhancing your experience with this delightful Honey Oat Bread while adding a fresh twist that your family will cherish.
Honey Oat Bread Recipe FAQs
How do I choose the right gluten-free flour for Honey Oat Bread?
Absolutely! For the best results in making Honey Oat Bread, choose a gluten-free all-purpose flour blend like Cup4Cup, which contains a mix of lighter starches to provide structure. Look for options specifically labeled as “measure-for-measure” to make substitutions straightforward and effective; this ensures your bread rises nicely and has a good texture.
How should I store leftover Honey Oat Bread?
Very simple! After enjoying your delectable bread, wrap any leftovers tightly in plastic wrap or store them in an airtight container. This way, it’ll stay fresh for up to 5 days in the refrigerator. Just make sure to keep it sealed to prevent it from drying out!
Can I freeze Honey Oat Bread?
Of course! To freeze your Honey Oat Bread, slice it into individual pieces after it has completely cooled. Then, place the slices in a freezer-safe bag or container. This method preserves flavor and freshness for up to 3 months. Simply thaw slices at room temperature or toast directly from frozen for a quick and delightful snack.
What should I do if my Honey Oat Bread turns out dense?
Don’t worry; it happens to the best of us! If your bread is dense, it might have been overmixed or improperly measured. Be sure to weigh your gluten-free flour for accurate amounts and avoid stirring the batter too much after combining wet and dry ingredients. Remember, a gentle fold is key to keeping that light, fluffy texture!
Is Honey Oat Bread suitable for people with allergies?
Certainly! Honey Oat Bread can accommodate various dietary needs. If you need a dairy-free option, simply substitute Greek yogurt with dairy-free yogurt and use almond milk or a similar non-dairy milk. Additionally, for an egg-free variation, you can use a commercial egg replacer or 3 tablespoons of aquafaba instead of an egg to bind the ingredients effectively.
How long does Honey Oat Bread last at room temperature?
The more the merrier when it comes to enjoying this delicious bread! At room temperature, Honey Oat Bread retains its quality for about 1 to 2 days if kept in a cool, dry place. Remember to store it in a loosely covered dish or paper towel to allow some air circulation, keeping it soft without trapping too much moisture.
Delicious Honey Oat Bread: Your New Go-To Quick Recipe
Ingredients
Equipment
Method
- Preheat your oven to 375°F (190°C) and grease a 9x5-inch loaf pan with coconut oil or butter. Line the bottom with parchment paper for easy removal.
- In a large mixing bowl, whisk together the gluten-free flour, baking powder, xanthan gum, and a pinch of salt. Ensure there are no lumps in the flour mix.
- In another bowl, combine the egg, Greek yogurt, melted coconut oil, and honey. Stir until well blended. Gradually pour in the almond milk and mix until smooth.
- Pour the wet mixture into the bowl with the dry ingredients and fold gently until just combined. Avoid overmixing.
- Spoon the batter into the prepared loaf pan, spreading it evenly. Sprinkle some rolled oats on top before smoothing the batter.
- Bake in the preheated oven for 30-45 minutes, checking for doneness with a toothpick.
- Allow the bread to cool in the pan for 10 minutes, then lift it out using the parchment paper and place it on a wire rack to cool completely.
Leave a Reply